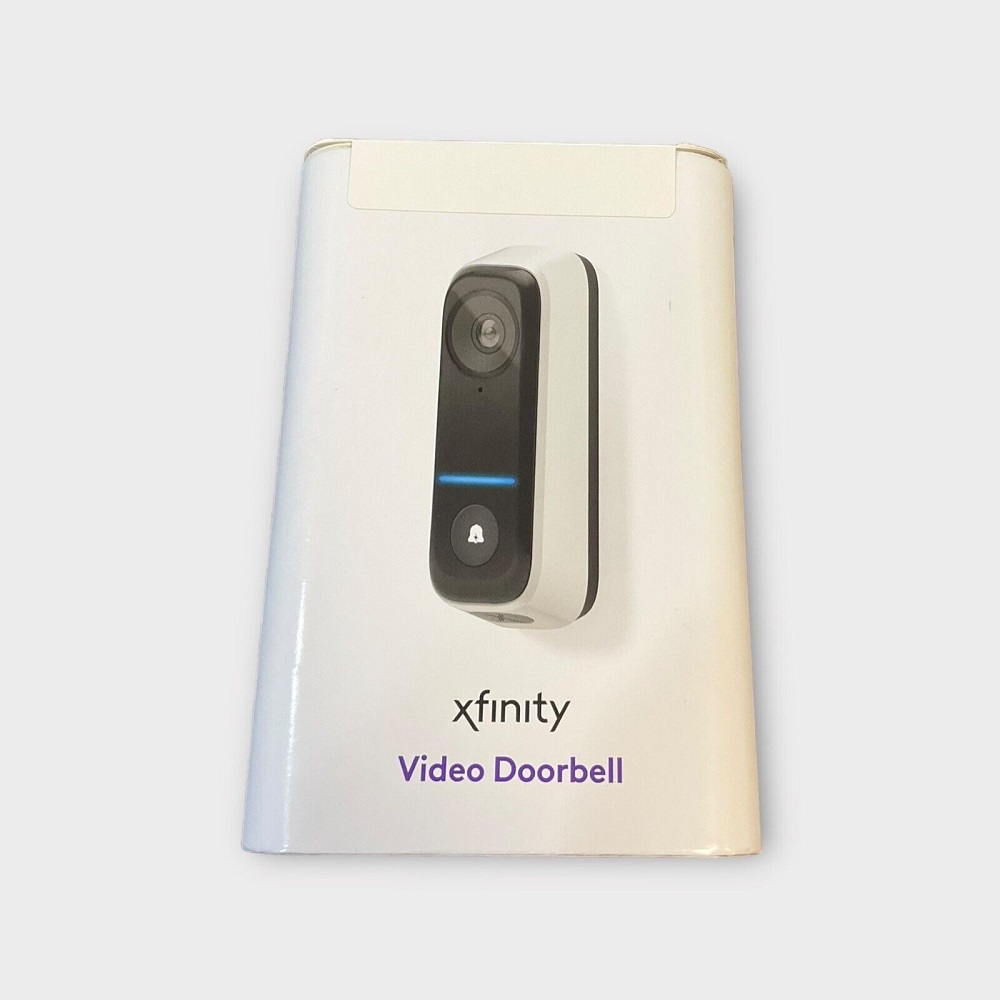
Smart home technology is reshaping the way we interact with our living spaces. Among these innovations, video doorbells have gained significant popularity for their convenience and security features. Xfinity, known for its reliable internet and home services, offers a video doorbell that integrates seamlessly with its ecosystem. The Xfinity Video Doorbell installation can upgrade your home security while offering various features. This guide aims to simplify the installation process, ensuring even beginners can set up their devices with confidence.
Understanding the Xfinity Video Doorbell
Features and Benefits
The Xfinity Video Doorbell offers numerous features that enhance home security and convenience. First and foremost, it allows homeowners to see who is at their door in real-time through a smartphone app. The doorbell includes a high-definition camera, night vision, and two-way audio capabilities. These features enable a clear and comprehensive view of visitors, whether it’s day or night.
Additionally, the Xfinity Video Doorbell supports motion detection alerts. Homeowners receive notifications whenever motion is detected near the door, adding an extra layer of security. This is particularly beneficial for monitoring package deliveries or keeping an eye on visitors when away from home.
Furthermore, the doorbell is designed to integrate with other Xfinity services, making it easier to manage home security through a single app. This cohesive integration can lead to a more streamlined user experience.
Compatibility Requirements
Before installing the Xfinity Video Doorbell, checking compatibility is crucial. The device typically requires a compatible Xfinity Internet plan. Homeowners should ensure they have a stable Wi-Fi connection with suitable bandwidth to support video streaming. Additionally, the installation may require existing doorbell wiring to facilitate power.
If your home does not have existing doorbell wiring, it is recommended to purchase an adapter or a battery-operated version of the doorbell, if available. Confirm compatibility with your current Xfinity equipment by checking the official Xfinity website or customer support resources.
Tools and Materials Needed for Installation
Essential Tools
Before starting the installation process, gather the necessary tools. Having everything prepared beforehand will help ensure a smooth installation experience. The following tools are typically required:
- Screwdriver: A Phillips head screwdriver is often needed to attach the doorbell securely.
- Drill: If there are no existing holes for screws, a drill may be required to create spaces for mounting.
- Level: This tool helps ensure that the doorbell is aligned properly during installation. Proper alignment helps guarantee the camera captures clear images at the correct angle.
Double-check that you have all the required tools available to speed up the installation. Without these tools, the process may become cumbersome or lead to complications.
Additional Materials
In addition to tools, collect the essential materials that come with the Xfinity Video Doorbell kit. These materials typically include:
- Mounting bracket: This bracket is used to secure the doorbell to the wall.
- Screws and anchors: These are required to fasten the mounting bracket to the wall.
- Wire nuts: If connecting to existing wiring, wire nuts may be necessary for secure connections.
It’s also wise to have a cleaning cloth handy to wipe down the area where the doorbell will be mounted. A clean surface ensures better adhesion and a professional appearance for the installation.
Preparing for Installation
Selecting the Right Location
Choosing the right location for your video doorbell is one of the most important steps in the installation process. Ideally, the doorbell should be positioned at a height that provides the best view of visitors without obstruction. Generally, this height is around four to five feet from the ground.
Additionally, consider the placement concerning natural lighting. Direct sunlight may create glare in the camera feed, while shadows may obscure the view during the late afternoon or evening. Testing the position by temporarily holding the doorbell in the desired spot can help visualize the view it will capture.
Turning Off Power and Preparing Wiring
Before starting any wiring work, ensure safety by turning off the power to the existing doorbell at the circuit breaker. This step prevents any accidental electrical shocks during installation. Once the power is turned off, remove the existing doorbell, if there is one. Take note of the wiring configuration so that you can replicate it when installing the new device.
If using existing wiring leads to complications, consider seeking assistance from a professional electrician. They can help ensure that the connections are safe and properly set up.

Connecting the Wires
Wiring the Doorbell
After verifying that power is turned off and the existing doorbell is removed, it’s time to connect the wires to the Xfinity Video Doorbell. Typically, the doorbell should have two wires coming out of the wall. These wires—often color-coded—will connect to corresponding terminals on the back of the doorbell.
The installation instructions usually provide clear guidance on how to connect the wires. For example, if using a wired connection, generally connect the wires according to the designated terminals (e.g., “Front” and “Common”). Ensure that the wire connections are secure and that no exposed wires are sticking out.
Securing the Connections
Once the wires are connected, it’s essential to secure them in place. Use wire nuts to cap the connections properly, preventing any electrical issues. Additionally, ensure that the connected wires do not interfere with the mounting bracket. Properly organized wiring contributes to a clean and professional appearance.
Double-check that all connections are tight and secure before proceeding to the next step. Loose connections can lead to connectivity issues or malfunctions after the installation is complete.
Mounting the Video Doorbell
Aligning the Mounting Bracket
After connecting the wires, align the mounting bracket with the appropriate position on the wall. Using a level can help ensure that the bracket is even. An even doorbell looks more professional and functions better in terms of capturing clear images.
If you need to mark the location for screw holes, use a pencil to make small marks on the wall. This will serve as a guide during drilling. Ensure that the marks are accurate, as misaligned screw holes can complicate the installation process.
Installing the Mounting Bracket
With the position marked, proceed to drill the holes in the wall if necessary. Make sure to use a drill bit size appropriate for the anchors provided in the kit. Once the holes are drilled, insert the anchors if required, and then attach the mounting bracket to the wall using the screws provided in the kit.
Once the bracket is securely in place, align the video doorbell with the mounting bracket. Gently push the doorbell onto the bracket until it clicks into place. This mechanism ensures that the doorbell remains securely fastened and can serve its intended purpose effectively.
Setting Up the Doorbell
Downloading the Xfinity App
After hardware installation is complete, the next step is setting up the Xfinity Video Doorbell through the Xfinity app. If you do not already have the app installed on your smartphone, download it from your device’s app store.
Once installed, open the app and log in with your Xfinity account credentials. After logging in, follow the prompts to add the video doorbell device to your account. This process typically involves scanning a QR code or entering the device’s unique identification number.
Configuring Settings
During setup, the app will prompt you to configure various settings. Choose preferences such as motion alerts, recording schedules, and other features available for your device. Tailoring these settings allows you to tailor the video doorbell to suit your security needs.
Make sure to test the alert notifications on your phone. This ensures that you receive timely updates whenever someone approaches your door or interacts with the doorbell. Familiarizing yourself with the app’s features can help you make the most of the video doorbell.
Finalizing Installation and Testing
Restoring Power
After successfully completing the installation, it’s time to turn the power back on at the circuit breaker. This step reactivates the voltage to the doorbell, allowing it to function correctly. Once the power is restored, check the status lights on the doorbell to ensure it has power and is functioning as expected.
Testing the Doorbell Functionality
With the power restored, conduct a test to ensure the video doorbell is working correctly. Press the doorbell button to see if it triggers a notification to your smartphone. Verify that the camera shows clear video and that the two-way audio functions properly.
Testing the motion detection feature is also essential. Walk in front of the camera to ensure that it captures your movement and sends an alert as expected. Proper testing is vital to ensure that the device functions correctly and provides peace of mind.
Enjoying Your New Xfinity Video Doorbell
The Xfinity Video Doorbell installation opens up a new world of security and convenience for your home. By following this guide, even beginners can navigate the installation process with ease. From understanding the features to setting up the app, each step is designed to help you confidently implement your new technology.
Once installed, the video doorbell can enhance your security system, offering peace of mind when away from home. With the ability to monitor visitors, receive alerts, and communicate directly through the app, it creates a more secure living environment. Embrace the modern convenience offered by your new Xfinity Video Doorbell installation and enjoy a safer, more connected home.
