Introduction
In today’s world, home security is more important than ever. A doorbell camera provides not only convenience but also peace of mind. With the ability to see who’s at your door from anywhere using your smartphone, doorbell cameras have become a popular choice among homeowners. However, the question remains: how to install doorbell camera effectively? Whether you’re a tech novice or a handy DIY enthusiast, this guide will offer essential tips for a smooth setup.
If you’ve recently purchased a doorbell camera or are considering adding one to your home security system, knowing how to properly install it can ensure the best performance. This article will detail everything from necessary tools to troubleshooting common issues when installing your new device. By the end of this guide, you’ll be well-equipped to tackle the installation process with confidence.
Why Install a Doorbell Camera?
Doorbell cameras are now essential for modern homes. They provide convenience, security, and peace of mind. With advancements in technology, these devices offer features like motion detection and smartphone alerts.
Benefits of Doorbell Cameras
Doorbell cameras bring multiple benefits. Firstly, they let you see who’s at your door without opening it. Secondly, they help deter package theft by monitoring deliveries. Thirdly, many cameras provide night vision for round-the-clock surveillance. Lastly, having recorded footage can be useful for resolving disputes or reporting suspicious activities.
Enhancing Home Security
A doorbell camera strengthens home security. It records any activity near your doorway. This footage acts as evidence if crimes occur. Additionally, the presence of a camera can discourage potential intruders. Advanced models offer two-way audio communication, allowing you to speak to visitors remotely. Enhanced security features ensure your family and property stay safe.
Choosing the Right Doorbell Camera for Your Home
Choosing the right doorbell camera is key for securing your home effectively. Your choice depends on several factors, including setup, convenience, and features. It’s essential to understand the differences and options before making a purchase.
Wired vs. Wireless Doorbell Cameras
Wired doorbell cameras connect directly to your home’s electrical system. They offer consistent power but require professional installation or DIY knowledge. These are ideal if your home already has existing doorbell wiring.
Wireless doorbell cameras rely on batteries or rechargeable power. They are easier to install and more flexible for placement. However, you may need to recharge or replace batteries periodically. These are best for homes without a wired system.
When deciding, consider the pros and cons of both types. Evaluate installation complexity, maintenance, and your home setup to select the right option.
Key Features to Look For
When shopping for a doorbell camera, focus on key features that enhance usability and security.
- Video Resolution: Higher resolution cameras provide clearer images. Look for at least 1080p quality.
- Two-Way Audio: This allows you to communicate with visitors remotely in real-time.
- Night Vision: Ensure visibility even in low-light conditions. Infrared or LED options work well.
- Motion Detection: Alerts you to activity near your doorway, enhancing security.
- Field of View: A wider field of view covers more area. Choose cameras with at least 160° coverage.
- App Integration: A smartphone app ensures you can control and monitor the camera remotely.
- Cloud Storage or Local Storage: Decide how you want to store footage—online or on an SD card.
Prioritize these features based on your home’s specific needs. The right features make your doorbell camera more effective and convenient.
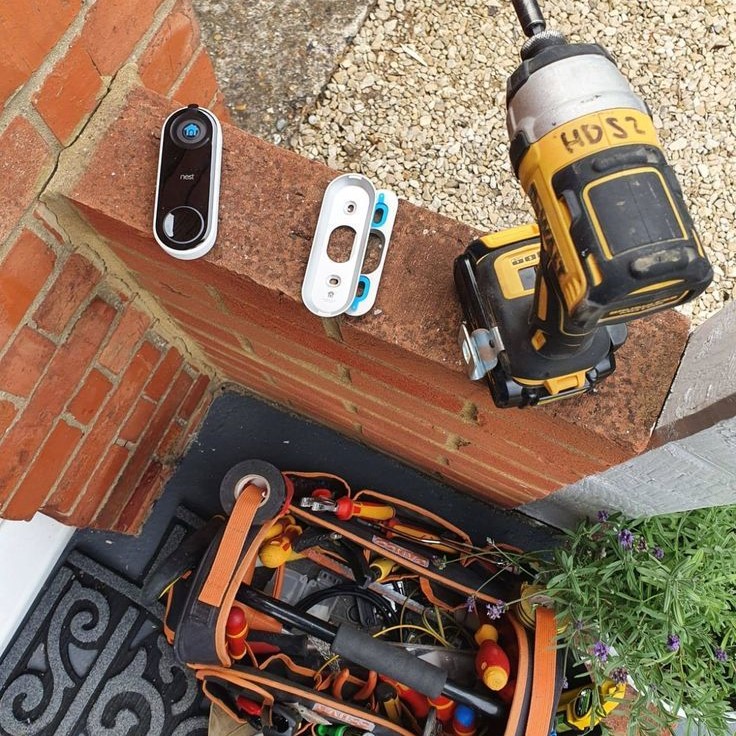
Tools and Materials Needed for Installation
How to install doorbell camera? A successful doorbell camera installation starts with having the right tools and materials. Proper preparation ensures a smooth setup process and minimizes unexpected challenges.
Essential Tools Checklist
To install your doorbell camera, gather the following essential tools:
- Screwdrivers: You’ll need both Phillips and flathead screwdrivers for tightening screws.
- Drill and Drill Bits: A drill is necessary for creating holes, especially if mounting on a hard surface.
- Measuring Tape: Use this to align your camera bracket properly.
- Level Tool: Ensure the camera is mounted evenly for optimal viewing angles.
- Wire Stripper: Prepare the wires by stripping them for clean connections.
- Voltage Tester: Check electrical wiring to ensure safety during installation.
- Safety Gloves: Protect your hands during the installation process.
Having these tools on hand speeds up the setup and ensures accuracy.
Installation Kit Components
Your doorbell camera package usually includes an installation kit. Here are the typical components:
- Camera Unit: The main device that will be mounted near your door.
- Mounting Bracket: Holds the camera securely to the wall or frame.
- Screws and Anchors: Use these to affix the bracket and camera.
- Wiring Harness: For wired cameras, these facilitate connections to existing doorbell wires.
- Battery or Charger: Included for wireless doorbell cameras.
- User Manual: Instruction guide detailing installation steps and troubleshooting tips.
- Additional Accessories: Such as waterproof casing or decorative plates.
Ensure all kit components are present before starting. Missing items can delay the installation process.
By having the necessary tools and materials ready, you’ll simplify the process of installing your doorbell camera.
Preparing for Installation
Proper preparation is essential before starting the doorbell camera installation process. Careful planning ensures a smooth setup without unnecessary delays. Here’s what you need to do before beginning.
Evaluating Your Doorway and Existing Doorbell
- Check Your Door Frame: Assess if your doorway has enough space for the camera to fit securely.
- Examine Existing Doorbell Wiring: Inspect if the current doorbell wires are in good condition for reuse.
- Choose the Best Mounting Spot: Ensure the chosen location provides an unobstructed view of visitors and the surrounding area.
- Verify Power Availability: For wired options, ensure proper electrical connections. For wireless, check battery requirements.
- Assess Weather Resistance: Confirm the camera will handle weather conditions at the installation site.
Thoroughly evaluating these factors will help you avoid installation complications later.
Safety Precautions Before Starting
- Turn Off Power: Shut down power to the existing doorbell circuit to avoid electric shocks.
- Use Proper Tools: Always work with the recommended tools to ensure precise and safe installation.
- Follow Manufacturer Instructions: Read the user manual for specific safety guidelines and setup details.
- Wear Safety Gear: Use gloves and goggles as protection during the process.
- Confirm Secure Ladder Placement: If mounting at a height, secure the ladder to prevent falls.
Taking these precautions ensures your installation process is safe and efficient.
Step-by-Step Installation Process
Installing a doorbell camera may seem tricky, but with the right steps, it’s manageable. Follow this guide to ensure a successful installation.
Removing the Existing Doorbell
- Turn Off Power: Switch off the circuit breaker for safety. Confirm the power is off using a voltage tester.
- Detach Old Doorbell: Use a screwdriver to remove screws and gently pull the old doorbell off.
- Disconnect Wires: Carefully detach the wires from the old doorbell. Label them if needed for clarity.
- Inspect Wiring: Ensure the wires are in good condition. Replace any frayed or damaged wires.
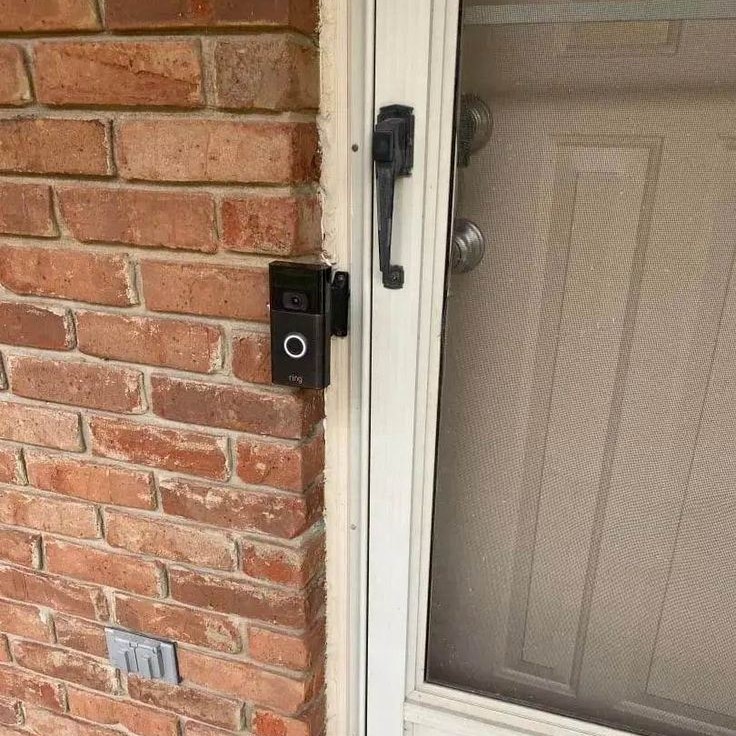
Mounting the Doorbell Camera Bracket
- Choose the Mounting Spot: Find a spot with a clear view of your doorstep and surroundings.
- Mark Drilling Points: Use the mounting bracket to mark where you’ll drill holes.
- Drill Holes: Drill holes at the marked points using appropriate drill bits for the surface.
- Insert Anchors: Insert wall anchors if mounting on hard surfaces like brick or concrete.
- Attach the Bracket: Secure the bracket using screws from the installation kit. Use a level tool to ensure alignment.
Wiring and Connecting the Doorbell Camera
- Connect Wires: Attach the doorbell camera’s wires to the existing doorbell wiring. Follow the user manual.
- Secure Connections: Tighten screws to ensure wires are firmly connected.
- Attach Camera: Mount the doorbell camera onto the bracket. Listen for a click if it snaps on.
- Turn Power Back On: Switch the circuit breaker back on to supply power to the camera.
Setting Up the App and Wi-Fi Connection
- Download the App: Install the doorbell camera’s companion app on your smartphone.
- Create an Account: Follow in-app prompts to set up your account.
- Connect to Wi-Fi: Use the app to connect the camera to your home’s Wi-Fi network.
- Pair the Camera: Complete pairing by scanning the camera’s QR code or following in-app steps.
- Test the Camera: Check live video footage and ensure app notifications function properly.
By carefully following these steps, you’ll install your doorbell camera smoothly and efficiently.
Testing and Configuring Your Doorbell Camera
After installation, testing and configuring your doorbell camera is crucial. These steps ensure the device operates correctly and meets your needs. Proper setup optimizes performance and enhances home security.
Ensuring Proper Functionality
- Check the Power Supply: Ensure your wired or wireless doorbell camera is receiving consistent power.
- Test Connectivity: Verify the camera is connected to your home Wi-Fi. Check the app for live streaming.
- Inspect Audio Quality: Test the two-way audio system. Ensure you can hear and speak clearly.
- Monitor Video Feed: Check for clear and uninterrupted video quality on your smartphone or device.
- Test Motion Alerts: Trigger motion detection to see if you receive alerts promptly in the app.
- Review Storage Options: Confirm that video recordings save correctly, whether in cloud storage or a local SD card.
Testing ensures your doorbell camera works as intended and gives you peace of mind.
Adjusting Camera Angles and Settings
- Position the Camera Correctly: Adjust for the optimal view of your doorway and surrounding area.
- Fine-Tune Angle: Use the app to test angles. Ensure no blind spots remain.
- Set Motion Zones: Define specific areas to monitor. Reduce false motion alerts from nearby streets or pets.
- Adjust Sensitivity: Set motion sensitivity to balance alert frequency and accuracy.
- Configure Notifications: Enable alerts through your smartphone for real-time updates on any activity.
- Test Night Vision: Ensure night vision works well in low-light settings for round-the-clock security.
Configuring your doorbell camera ensures it meets your specific home security needs. Regularly revisit settings to maintain optimal performance.
Troubleshooting Common Installation Issues
Even with careful planning, doorbell camera installation isn’t always flawless. Troubleshooting can resolve common issues effectively. Follow these tips to identify and fix problems during installation.
Problems with Wiring Connections
Wiring issues are common, especially with wired doorbell cameras. Here’s how to address them:
- Check Wire Compatibility: Ensure your existing wires match the camera’s requirements.
- Inspect Wire Condition: Replace damaged or frayed wires to avoid faulty connections.
- Verify Connections: Secure wires firmly in the connectors to prevent disconnections.
- Use Voltage Tester: Test wires for live current before proceeding with adjustments.
- Follow Instructions: Refer to the user manual for specific wiring guidelines.
If wiring issues persist, consult a professional or the manufacturer for assistance.
Wi-Fi Connectivity Challenges
Wireless cameras depend on a stable internet connection. Troubleshoot Wi-Fi problems with these steps:
- Check Signal Strength: Ensure the camera is within range of a strong Wi-Fi signal.
- Restart Router: Reboot your router to fix temporary connectivity problems.
- Update Firmware: Check for updates to improve the camera’s compatibility with your network.
- Verify Password: Ensure the correct Wi-Fi password is entered during setup.
- Reduce Interference: Move the router away from other electronic devices to enhance connectivity.
If connectivity problems persist, try switching to a different network frequency (e.g., 2.4GHz or 5GHz).
Addressing Power Supply Issues
Power supply problems can disrupt both wired and wireless camera performance. Troubleshoot power issues by:
- Check Power Flow: Ensure the circuit breaker is on and functioning properly.
- Inspect Batteries: Recharge or replace batteries as needed for wireless cameras.
- Examine Connections: Ensure secure and accurate wiring for wired options.
- Use Voltage Tester: Confirm voltage levels are sufficient for the camera.
- Consider Backup Power: Invest in a battery backup or uninterruptible power supply for consistent operation.
Resolving power-related challenges ensures your camera works efficiently and reliably.
By addressing these common installation issues, you can optimize your doorbell camera’s functionality and maintain a secure home environment.
Maintenance Tips for Doorbell Cameras
Regular maintenance keeps your doorbell camera working efficiently and extends its lifespan. It ensures consistent security and optimal performance over time.
Keeping the Camera Clean
- Wipe the Lens Regularly: Clean the lens to maintain clear video quality. Use a microfiber cloth.
- Remove Dust and Debris: Check for dirt or cobwebs on the camera casing. Remove them gently.
- Check for Water Damage: Regularly inspect for moisture buildup, especially in rainy or humid areas.
- Inspect Mounting Bracket: Ensure the bracket remains secure to avoid misalignment or loose fittings.
- Avoid Harsh Chemicals: Use mild cleaning solutions to prevent damage to sensitive camera components.
- Protect Against Weather: Use a protective cover if the camera isn’t weather-resistant.
Cleaning your camera regularly ensures crystal-clear footage and prevents long-term damage.
Updating Software and Firmware
- Check for Updates: Regularly check the manufacturer’s website or app for software updates.
- Enable Auto-Updates: If available, turn on automatic updates for convenience.
- Fix Bugs and Improve Features: Firmware updates often resolve issues and add enhanced functionality.
- Update the Companion App: Ensure your smartphone app is updated to sync correctly with the camera.
- Improve Security Measures: Updates enhance encryption and protect against hacking attempts.
- Restart After Updating: Reboot the device to ensure updates apply correctly.
Keeping software and firmware updated boosts performance and reinforces security features.
Conclusion
In conclusion, understanding how to install doorbell camera is crucial for enhancing the security of your home. By following the tips outlined in this article, from preparing for installation to maintaining your device, you can ensure a smooth setup and optimal performance. Whether you’re a DIY enthusiast or a first-time installer, these guidelines will empower you to effectively secure your home with a doorbell camera. Enjoy the peace of mind that comes with increased security and the convenience of knowing who’s at your door, no matter where you are!