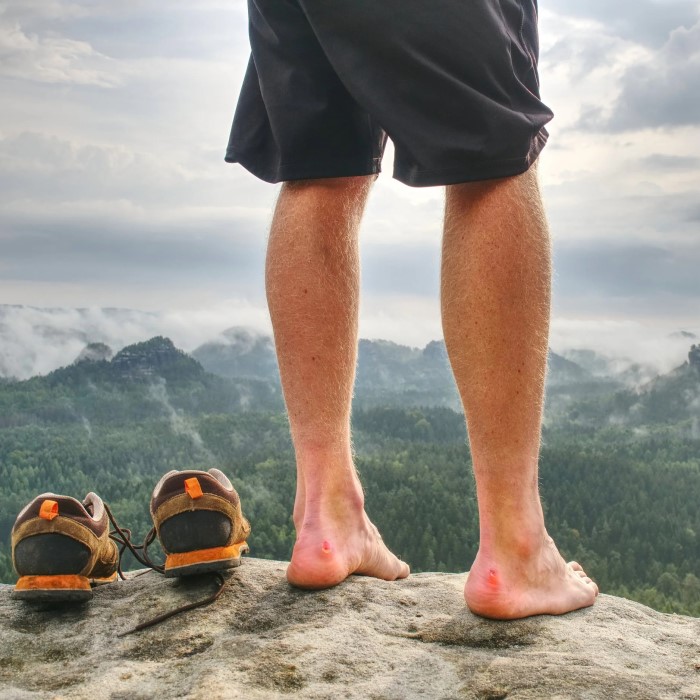
Hiking connects us with nature. It offers fresh air and exercise. However, foot pain can ruin a great trek quickly. One of the most common issues hikers face is blisters. These fluid-filled pockets of skin are painful. They turn a pleasant walk into a struggle. Every step becomes a reminder of the friction on your feet. Consequently, knowing the right hiking blisters treatment is essential for every outdoor enthusiast. It does not matter if you are a beginner or a seasoned trekker. You need to know how to handle this problem.
Blisters occur due to friction, heat, and moisture. When these three elements combine, the skin layers separate. Fluid fills the gap to protect the tissue. This is the body’s natural defense mechanism. However, it hurts. Therefore, you must act fast. In this comprehensive guide, we will explore how to treat these injuries. We will also discuss how to prevent them. Proper preparation can save your feet. The right knowledge ensures you finish your hike safely. So, let us dive into the world of foot care. We will ensure your next adventure is blister-free.
Understanding the Causes of Hiking Blisters
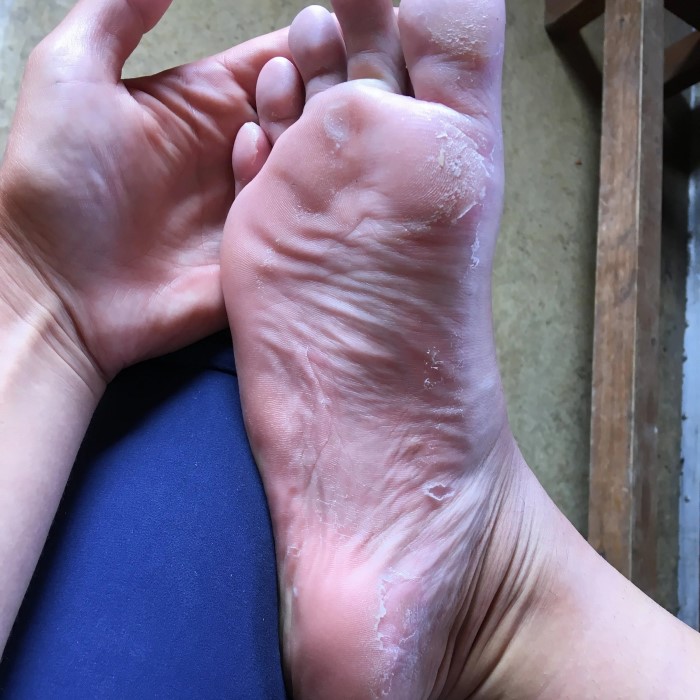
To treat a problem, you must understand its origin. Blisters are not random occurrences. They are the result of specific physical forces. The primary cause is friction. When your skin rubs against your sock or shoe, it creates heat. This heat damages the skin layers. Furthermore, moisture plays a critical role. Sweat or wet conditions soften the skin. Soft skin is more susceptible to damage. It tears easily under pressure. Therefore, a hot, wet environment inside your boot is a recipe for disaster. Additionally, ill-fitting footwear is a major culprit. Shoes that are too tight create pressure points. Shoes that are too loose allow your foot to slide. This sliding increases friction. Consequently, the fit of your boot is paramount.
Moreover, socks are just as important as shoes. Cotton socks are notorious for causing blisters. They absorb moisture and hold it against your skin. This creates the perfect environment for friction burns. In contrast, synthetic or wool socks wick moisture away. They keep your feet drier. Another factor is the terrain. Hiking on steep downhills often pushes your toes forward. This increases pressure on the toes and heels. Debris in your shoe can also cause issues. A small pebble or a twig can rub against the skin. It acts like a tiny irritant.
Over miles, this small irritation becomes a painful blister. Therefore, understanding these causes helps in prevention. You must control heat, moisture, and friction. If you can manage these three elements, you can minimize your risk. However, if a blister does form, you must know how to treat it. Knowing the cause also helps you assess the severity. You can identify if it is a simple friction blister or something more serious.
Immediate Steps for Hiking Blisters Treatment
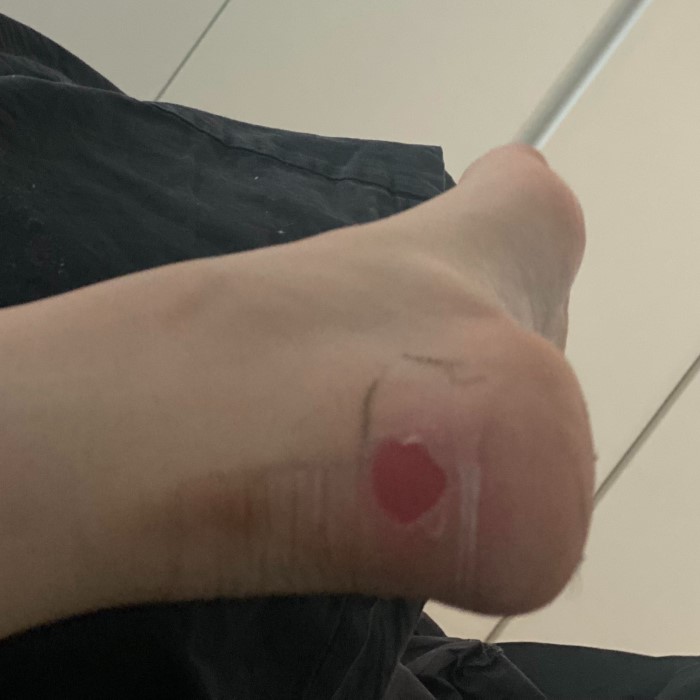
You are on the trail. You feel a hot spot on your heel. It is the start of a blister. What do you do? Immediate action is crucial. The moment you feel discomfort, stop walking. Do not wait until the pain is unbearable. The first step is to inspect your foot. Take off your boot and sock. Look at the area. If the skin is just red and warm, you are in luck. It is a “hot spot.” You can treat this easily. First, dry your foot thoroughly. If possible, change your socks. Put on a dry pair. This reduces moisture. Next, you need to protect the area. You can use a piece of moleskin or a bandage. Place it over the hot spot. This creates a barrier between your skin and the friction.
However, if a blister has already formed, the treatment is slightly different. If the blister is small and intact, do not pop it. The skin acts as a natural barrier against bacteria. It protects the sensitive tissue underneath. Instead, cushion it. Use a donut-shaped pad made of moleskin. Cut a hole in the center for the blister. This keeps pressure off the area. Consequently, you can continue your hike. If the blister is large and painful, you might need to drain it. This is a decision you should make carefully. We will discuss drainage in the next section. For now, focus on cleaning and covering. If you have antiseptic wipes, use them to clean the area. Apply an antibiotic ointment if available.
To Pop or Not to Pop: A Comprehensive Guide
This is a common debate among hikers. Should you pop a blister? The general rule is to leave it intact. The fluid inside is sterile. The skin protects the wound from infection. Therefore, if the blister is not too painful, let it be. Your body will absorb the fluid over time. The skin will dry and fall off naturally. However, there are exceptions. If the blister is very large, it will likely pop on its own. If it is under a high-pressure area, like your heel, it will hurt with every step. In these cases, draining the fluid provides relief. It also prevents the blister from tearing open.
If you decide to drain it, you must be sterile. Wash your hands with soap and water. Clean the blister and the surrounding skin. Use an alcohol wipe or iodine. Take a sterilized needle. You can sterilize it with alcohol or heat. Pierce the blister at the edge. Make several small holes. This allows the fluid to drain. Do not remove the loose skin. The skin flap still protects the raw skin underneath. Gently press the area to remove the fluid. Apply an antibiotic ointment. Cover the area with a non-stick bandage.
Check it regularly for signs of infection. This is a risky procedure in the wilderness. Dirt and bacteria are everywhere. Therefore, think twice before you pop. If you have diabetes or poor circulation, never pop a blister yourself. Seek medical help instead. For the average hiker, sterile drainage is a safe option. It offers relief while maintaining some protection. The choice depends on the situation. Assess the pain and the risk. Make an informed decision.
Essential Gear for Your First Aid Kit
Every hiker should carry a blister kit. It is as important as a map or water. A few small items can make a huge difference. First, you need a selection of bandages. Adhesive bandages in various sizes are useful. They are good for small cuts and hot spots. Second, moleskin is essential. It is a soft, thick fabric with an adhesive back. It is the gold standard for blister care. You can cut it to any shape. It provides cushioning. Third, consider hydrocolloid dressings. These are specialized bandages for blisters. They create a moist environment. This speeds up healing. They also stay on for days. They are excellent for hiking blisters treatment on the trail. Furthermore, do not forget antiseptic. Alcohol pads or iodine swabs are necessary for cleaning. An antibiotic ointment is also a smart addition.
Additionally, include a needle or safety pin. Keep it in a sterile wrapper. You might need it to drain a blister. Second skin or liquid bandage is another option. It forms a protective layer over the wound. It can be applied to hot spots as well. Finally, a small pair of scissors or a knife is useful. You need them to cut moleskin.
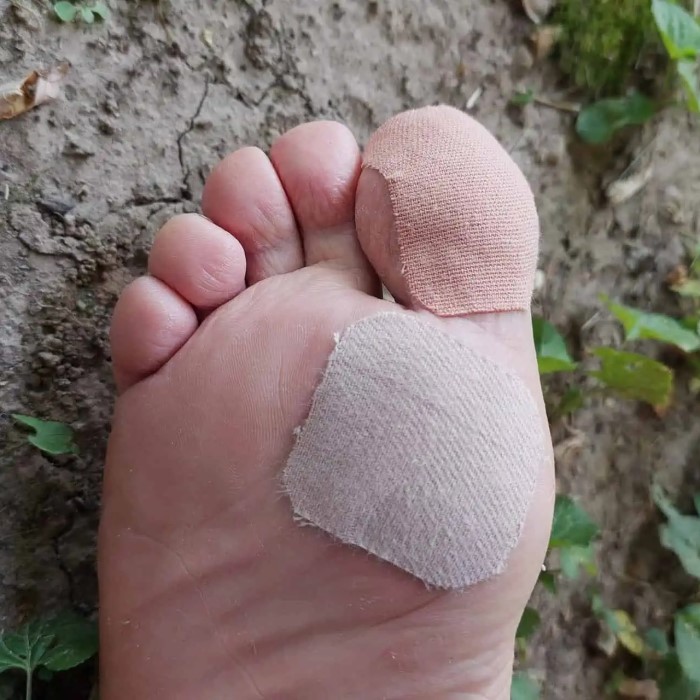
Duct tape can also be a lifesaver. If your moleskin falls off, duct tape stays. It provides a tough barrier. However, do not put duct tape directly on a blister. It can rip the skin off when you remove it. Put a gauze pad over the blister first. Then, secure it with duct tape. Organize these items in a small waterproof bag. Keep it in an accessible pocket. You do not want to dig through your whole pack to find a bandage. Being prepared means you spend less time in pain. It means you can enjoy your hike.
Advanced Healing Techniques for Home Care
Once you finish your hike, the care continues. You are now in a controlled environment. You have better resources for healing. If the blister is still intact, keep it clean. Avoid soaking it in water for long periods. Let the air get to it when possible. If you have drained the blister, apply antibiotic ointment daily. Change the bandage every day or if it gets wet. Look for signs of infection. Redness spreading from the wound is a bad sign. Pus or excessive heat is also concerning. If you see red streaks going up your leg, seek a doctor immediately. This could be blood poisoning. It is a serious condition.
For faster healing, keep the area dry. Wear open-toed shoes or sandals around the house. This reduces pressure and friction. It allows the skin to breathe. If the skin has died and is dry, you can carefully trim it. Use sterilized scissors to cut away the dead skin. Do not pull on it. Pulling can tear healthy skin. Apply a moisturizer to the new skin once it heals. This helps restore the skin barrier. Vitamin E oil or aloe vera can reduce scarring. Additionally, give your feet time to rest. Do not jump back into hiking immediately.
Let the new skin toughen up. You can do foot soaks with Epsom salts. This reduces swelling and soothes the skin. However, dry the area thoroughly after soaking. Moisture promotes bacterial growth. Proper aftercare ensures the blister heals quickly. It also prevents complications. You want to be ready for your next adventure quickly. Taking these steps seriously shows you respect your body.
Prevention Strategies: The Best Treatment
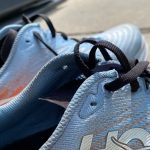
The best hiking blisters treatment is prevention. If you stop blisters before they start, you win. It starts with your boots. Buy high-quality hiking boots. Ensure they fit correctly. Visit a store that measures your feet. Try on boots with the socks you plan to wear. There should be a thumb’s width of space at the toe. Your heel should not slip when you walk. Walk around the store. Do not rush this process. Break in your boots before a long hike. Wear them around the house. Wear them on short walks. This softens the leather and molds the boot to your foot. Furthermore, choose the right socks.
Do not wear cotton. Choose synthetic materials or wool. Merino wool is excellent. It regulates temperature and wicks moisture. It also resists odors. Some hikers wear a double layer of socks. A thin liner sock inside a thicker hiking sock reduces friction. The socks rub against each other instead of your skin. This is a highly effective method. Additionally, keep your feet dry. If your feet sweat a lot, change your socks during the hike. Take breaks to air out your feet. Remove your boots and socks at lunch. Let your feet cool down.
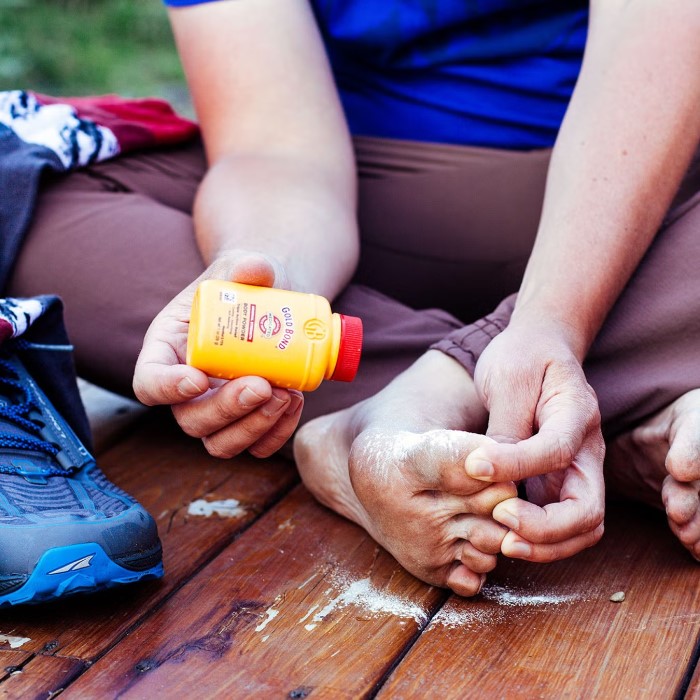
Use foot powder to absorb moisture. This keeps the skin dry and tough. You can also use lubricants. Vaseline or specialized anti-chafing balms reduce friction. Apply them to hot spots before you start hiking. Taping your feet is another strategy. Apply Leukotape or moleskin to areas prone to blisters. Do this before you feel pain. It acts as a second skin. By combining these strategies, you drastically reduce the risk. Your feet will thank you.
Natural Remedies and Myths Debunked
There are many home remedies for blisters. Some work, and some are myths. One common myth is to let the air heal it. While airing out a foot is good, raw skin needs protection. Leaving an open blister exposed can lead to infection. Another myth is to tear the skin off completely. This is dangerous. It exposes the raw dermis. It hurts more and takes longer to heal. Always leave the skin flap in place. Some people suggest using essential oils. Tea tree oil is a popular choice. It has antiseptic properties. It can help clean the wound. However, use it with caution. It can be irritating to sensitive skin. Dilute it with a carrier oil. Aloe vera is a safe natural remedy. It soothes the burn and keeps the area moist.
Another common discussion point is vinegar. Some say apple cider vinegar helps. It has antibacterial properties. However, it will sting intensely. It is not recommended for open wounds. Honey is another option. Manuka honey has healing properties. It can act as a wound dressing. It keeps the wound moist and fights bacteria. However, it is sticky and messy on the trail. It attracts bugs. Therefore, stick to medical supplies for hiking. Save the honey for home care. A persistent myth is that blisters are a rite of passage. This is false. Blisters are an injury. They mean something is wrong with your gear or fit. You can prevent them. Do not accept pain as part of hiking. By debunking these myths, we focus on science. We focus on effective hiking blisters treatment. Use proven methods. Keep the wound clean. Protect it from further friction. This is the path to healing.
When to Seek Professional Help
Most blisters are minor. They heal on their own with basic care. However, there are times when you need a doctor. Infection is the biggest risk. If the pain gets worse instead of better, be worried. If the area becomes very red and hot, it is a sign. Pus draining from the blister indicates infection. Red streaks extending from the blister are serious. You need antibiotics. Do not ignore these symptoms. People with diabetes need to be extra careful. Neuropathy can make it hard to feel a blister. A small sore can become a large ulcer. If you have diabetes, inspect your feet daily. Seek professional care for any foot issues.
Furthermore, if you have a large blood blister, see a doctor. Blood blisters are darker. They happen when blood vessels break. They can be very painful. A doctor can drain it safely. If the blister covers a large area of the foot, do not try to treat it yourself. You might have an underlying condition. Sometimes, what looks like a blister is actually a spider bite or a burn. If you are unsure of the cause, get it checked. A doctor can properly clean and dress the wound. They can provide stronger antibiotics. They can also offer advice on foot care. It is better to be safe than sorry. An infection in the foot can limit your mobility. It can even lead to blood poisoning. Knowing when to ask for help is part of being a responsible hiker. Take your health seriously.
Frequently Asked Questions
How long do hiking blisters take to heal?
Most small blisters heal within three to seven days. Larger blisters may take up to two weeks. The healing time depends on how well you care for the wound. If it remains clean and protected, it heals faster. If it gets infected, it takes longer.
Why do hikers get blisters?
Hikers get blisters due to friction, moisture, and heat. The repetitive rubbing of the foot against the sock or shoe causes the skin layers to separate. Poorly fitting boots and wet socks increase the risk. This is why proper gear is essential.
Should you let your blisters pop on hikes?
Ideally, you should not let a blister pop on its own. The skin protects the wound from infection. If it pops, you must clean it immediately. If a blister is large and painful, it is better to drain it cleanly with a sterile needle. This is safer than letting it tear.
Summarize
Hiking blisters are a common ailment. They can stop you in your tracks. However, with the right knowledge, you can manage them effectively. We have covered the causes. We have explored the best methods for hiking blisters treatment. You now know how to handle hot spots and blisters. Remember that prevention is key. Proper boots and socks make a world of difference. Do not ignore foot pain. Address it immediately. Take breaks and check your feet. If you feel a hot spot, stop and treat it. Your feet are your most important tool on the trail. Take care of them. Use this guide as your resource. It will help you stay comfortable. You can focus on the beauty of nature. You do not need to focus on your feet. Enjoy your next hike pain-free.