The Ring Video Doorbell 2 installation is a fantastic addition to home security, offering convenience and peace of mind. However, installation can sometimes present challenges that may frustrate even the most tech-savvy users. This guide will address common issues faced during the installation process and provide practical solutions to ensure that your Ring Video Doorbell 2 works perfectly.
Preparing for Installation
Gathering Required Tools
Before starting the installation of your Ring Video Doorbell 2, gather all the necessary tools. Typically, you will need a screwdriver (either Phillips or flathead, depending on your doorbell’s screws), a drill with bits for wall mounting, and a level to ensure your doorbell is straight. Additionally, having a pair of wire strippers handy can be beneficial if you plan to hardwire the device.
Once you have all your tools, reading through the instruction manual, which comes with your device, is imperative. It provides vital information on the installation process and safety precautions to keep in mind.
Assessing the Location
Choosing the right location for your Ring Video Doorbell is crucial for optimal performance. Ideally, it should be mounted at about 48 inches above the ground. This height helps to capture the best angle for video footage while avoiding obstructions that could affect the camera’s field of view.
Examine the area around your doorbell location for potential obstructions like trees, wall decorations, or overhangs. Make sure the doorbell won’t face direct sunlight, as this can cause glare and affect video quality. Positioning your doorbell carefully will contribute to better functionality and enhance the overall effectiveness of the device.
Power Supply Issues
Understanding Power Options
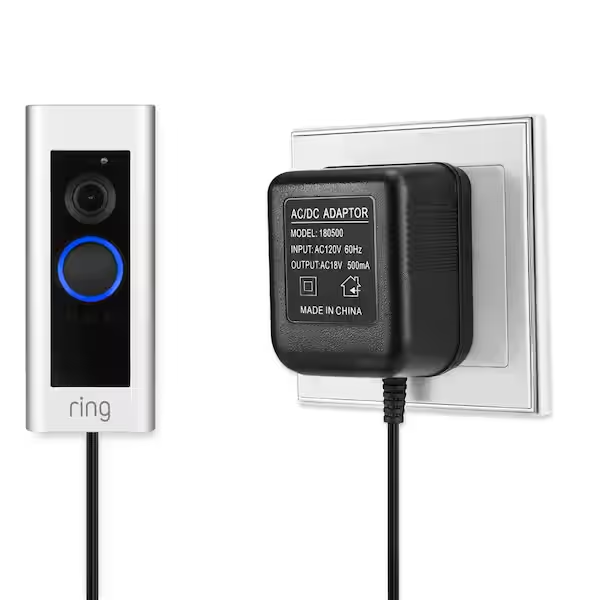
The Ring Video Doorbell 2 can be powered either through a battery or through hardwiring using existing doorbell wires. If you opt for battery power, make sure it is fully charged before installation. If you’re using existing wires, confirm that the voltage is between 16 to 24 volts. If the voltage is too low, the doorbell may not function correctly.
Using a multimeter can help you test the voltage of the existing doorbell wires. If the voltage is outside the recommended range, you might need to install a transformer or use the battery option until you can address the wiring issue properly.
Dealing with Low Battery Notifications
Once you’ve installed your Ring Video Doorbell 2, keep an eye on battery notifications. If you receive alerts prompting a battery check or replacement, it’s essential to take action quickly. Low battery levels can impair the doorbell’s performance, impacting video quality and connectivity.
Charge the battery as soon as possible, and consider scheduling routine checks every few months to ensure it operates effectively. If you consistently face battery drain issues, consider hardwiring the doorbell for a continuous power supply. This change eliminates the worry of battery maintenance and enhances the device’s reliability.
Connectivity Issues
Troubleshooting Wi-Fi Connection Problems
Wi-Fi connectivity is crucial for the Ring Video Doorbell 2 to function correctly. If you find that your doorbell isn’t connecting to Wi-Fi, it can lead to multiple functional problems. Start by ensuring that your Wi-Fi network is operational and that you’re within range.
You may need to move your router closer to the doorbell, or consider using a Wi-Fi extender to enhance the signal strength. Weak signals can disrupt connectivity, leading to delays or dropped connections. It’s also worth checking that you have the correct Wi-Fi password, as an incorrect password will prevent the doorbell from connecting to your network.
Resetting the Doorbell
If connectivity issues persist despite following the previous steps, you might consider resetting the Ring Video Doorbell 2. To do this, locate the reset button on the device, which is generally near the camera. Press and hold the reset button for about 15 seconds. This action restores factory settings, allowing you to start the installation process again.
After resetting, reconnect the doorbell to your Wi-Fi network following the app instructions. A successful reconnection will solve most connectivity problems, ensuring that you’re able to receive alerts and view live footage from your device.
App Configuration Challenges
Setting Up the Ring App
After installation, the next critical step is configuring the Ring app. Open the app and log in or create a new account if needed. If you encounter problems during this setup, ensure your device OS (iOS or Android) is up-to-date. Outdated software can cause compatibility issues and hinder your setup process.
Once you’re logged in, follow the prompts to add a new device. Make sure your phone is connected to the Wi-Fi network you want to connect the doorbell to. Sometimes, toggling Wi-Fi off and back on can help fix minor glitches during setup.
Understanding Notification Settings
Once your Ring Video Doorbell 2 is connected, it’s crucial to configure your notification settings. Customizing these settings ensures you receive alerts that matter most to you. Navigate to the app’s settings and choose how you want to receive notifications—whether through push notifications, emails, or both.
Additionally, consider setting up motion zones and sensitivity levels to fine-tune how and when you receive alerts. By personalizing these parameters, you can minimize unnecessary notifications while ensuring you stay informed about any important activity at your door.
Mounting Problems
Issues with Mounting Height and Angle
If you experience trouble with the physical installation, reassess the mounting height and angle. Ensure that the doorbell is firmly attached to the mounting bracket and that it is positioned correctly for optimal camera views.
Use a level during installation to confirm that your device is straight. A misaligned doorbell can affect functionality, including motion detection and video quality. If you find your ring doorbell too low or high, it might be worth relocating or adjusting its position to capture a wider field of vision.
Preventing Theft and Vandalism
Since doorbells are mounted on the exterior, they can be targets for theft or vandalism. To enhance security, consider using security screws instead of standard screws for mounting. This added protection deters potential thieves and ensures that your doorbell remains securely in place.
Another option to consider is a protective housing or cover. While it may not be necessary for all situations, investing in extra security can provide peace of mind, especially in high-risk areas. Ensuring your doorbell is firmly mounted and secured is crucial to maintaining its functionality and your home security.
Video Quality and Lighting Concerns
Evaluating Video Quality
After installation, make sure to check the video quality through the Ring app. If you notice graininess or low resolution, it may be due to poor lighting conditions. The Ring Video Doorbell 2 has a wide field of view, but low light can significantly impair video clarity.
To improve video quality, consider enhancing outdoor lighting at your door. Motion-activated lights or soft LED fixtures can provide adequate illumination without being harsh. Additionally, cleaning the camera lens regularly helps maintain clarity by removing dirt or smudges that can obstruct quality.
Adjusting Motion Sensitivity
Another factor affecting video quality is motion sensitivity settings. If your doorbell is too sensitive, it might capture excessive background activity and flood your notifications. Conversely, if it’s not sensitive enough, you could miss crucial footage.
Adjust these settings until you find a balanced level that captures the essential activity around your front door without overwhelming notifications. Pair your video setup with effective lighting, so you consistently receive optimal footage.
Seeking Professional Help
When to Reach Out for Support
If you’ve tried these troubleshooting steps and still face issues, don’t hesitate to seek assistance. The Ring customer support team is available to provide troubleshooting advice tailored to your specific problem. They can help you navigate unique situations that may not fit typical scenarios.
Before reaching out, gather relevant information about your installation, such as Wi-Fi network specifications, any error messages, and details about your current setup. This information will help the customer support team diagnose your problem more quickly and accurately.
Exploring Online Resources
In addition to official support, consider the wealth of online resources available. Ring’s website offers extensive troubleshooting guides, FAQs, and community forums where users can share their experiences. You may find answers to questions you haven’t yet considered.
Engaging with fellow Ring users can provide insightful tips and tricks. Many users share stories about their setups and solutions, helping you navigate common problems that others have encountered. Leveraging this community resource can enhance your understanding and improve your overall experience with your Ring Video Doorbell 2.
Achieving a Successful Installation
Successfully installing the Ring Video Doorbell 2 installation enhances your home security and provides valuable peace of mind. Understanding common issues and their solutions can pave the way for a smooth installation process.
From preparing your installation space and choosing the right location to troubleshooting connectivity and video quality issues, this guide equips you with the knowledge needed to confidently install and maintain your Ring device. By following these steps and utilizing available resources, you’ll be well on your way to enjoying all the benefits that the Ring Video Doorbell 2 has to offer.