The Ring Video Doorbell 4 is a fantastic addition to any home security system, allowing homeowners to monitor their front door from anywhere. With its high-definition video, two-way audio, and advanced features like Color Night Vision, it enhances security while providing convenience and peace of mind. Installing the Ring Video Doorbell 4 might seem intimidating, especially if it’s your first time dealing with video doorbells. This guide simplifies the process into clear, manageable steps, making it easy for you to set up your doorbell in no time.
Unboxing and Understanding the Components
What’s Inside the Box?
Before diving into the installation, familiarize yourself with what comes in the Ring Video Doorbell 4 box. Expect to find the video doorbell itself, an installation toolkit, mounting bracket, screws, a wedge kit for angled mounting, a quick-start guide, and a user manual. The quick-start guide is particularly helpful in outlining the basic setup steps, while the user manual provides more detailed information on the product’s features.
Take a moment to inventory the items to ensure you have everything you need. Having the right components at hand will make the installation process smoother. You may also want to download the Ring app on your smartphone if you haven’t done so already. This app will play a crucial role in configuring your new doorbell.
Understanding the Device Features
The Ring Video Doorbell 4 offers numerous features designed to enhance your home security. Key features include Full HD 1080p video, two-way audio for communication, Color Night Vision for clearer views after dark, and improved motion detection with customizable settings. Understanding these features before installation prepares you for utilizing them effectively once your doorbell is up and running.

Preparing for Installation
Choosing the Right Location
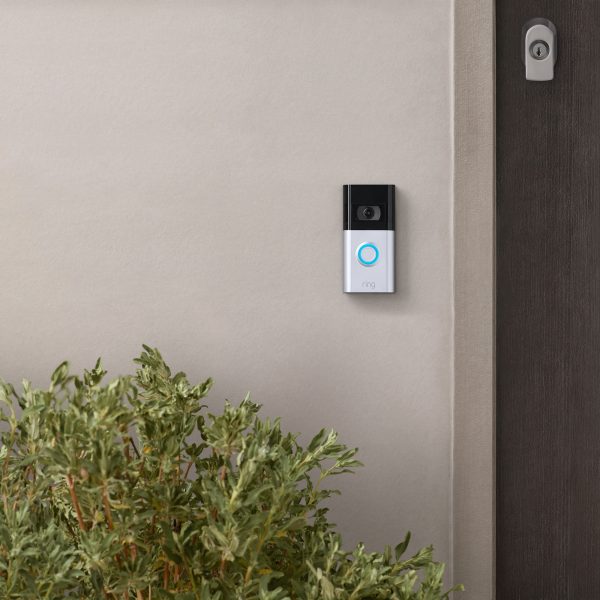
Selecting the ideal location for your Ring Video Doorbell is critical for maximizing its effectiveness. Aim to install it at a height of around 4 feet from the ground for the best camera angle and to capture facial details clearly. Ensure a clear view of the area in front of your door without obstructions like bushes, railings, or overhangs.
If you live on a busy street, try positioning the doorbell so that it captures motion while minimizing false alerts from passing cars. The wider the field of view, the more effective the doorbell will be at notifying you of any visitors or movements at your entrance.
Gathering Tools
To install the Ring Video Doorbell 4, you’ll need a few tools that should be easily accessible. Gather a Phillips screwdriver to secure screws, a level to ensure that the doorbell is straight, and a drill with drill bits if you plan to install on hard surfaces like brick or stucco. Also, have a pencil handy to mark where the screws will go. By having all your tools ready, you can streamline the installation process and avoid interruptions.
Power Options: Hardwired vs. Battery
Understanding Power Options
The Ring Video Doorbell 4 offers flexible power options to suit different setups. You can hardwire the doorbell into your existing doorbell wiring for a continuous power supply. This option is ideal for people who already have a wired doorbell system in place and want the added convenience of not having to recharge the battery regularly.
Alternatively, you can use the built-in rechargeable battery. This option allows for a more straightforward installation, especially in homes without an existing doorbell. The battery is designed to last several months on a single charge, making it convenient for users who prefer simpler setups.
Hardwiring the Doorbell
If you opt to hardwire the doorbell, start by turning off the power to your existing doorbell at the circuit breaker to ensure safety. Disassemble the old doorbell and disconnect the wires. Once disconnected, attach the new doorbell to the same wires. Match the wires to the corresponding terminals on the Ring device, making sure you secure them tightly.
After connecting the wires, restore power at the circuit breaker to test if the installation is successful. If the doorbell lights up and connects to your app, you’ve successfully hardwired it.
Installing the Battery
For a simpler approach, you can use the rechargeable battery. To install, simply remove the battery from its packaging and insert it into the back of the Ring Video Doorbell 4 until you hear a click. The app will confirm whether the battery is charged and functioning properly.

Mounting the Ring Video Doorbell 4
Marking and Drilling Mounting Holes
With your doorbell powered up, it’s time to secure it in place. Start by holding the mounting bracket against the wall where you want to install the doorbell. Use a level to check that the bracket is even, and use a pencil to mark where you’ll drill your holes.
If your doorbell is going on wood, use a simple drill bit. However, if you’re drilling into brick or stone, use a masonry drill bit to create the holes necessary for wall anchors. Each of the wall anchors will act as a sturdy support for the doorbell.
Secure the Mounting Bracket
Next, use the screws provided in the installation kit to secure the mounting bracket to the wall. Carefully align the bracket to the marks you made earlier and screw it in, making sure it’s firmly attached. A secure mounting bracket ensures that the doorbell stays in place over time without any wobbling or movement.
Attaching the Doorbell
Once the bracket is secured, it’s time to attach the doorbell itself. Line up the back of the Ring Video Doorbell 4 with the mounting bracket and press it against the bracket until you hear a click. The audible click confirms that the doorbell is securely attached.
Connecting to Wi-Fi and App Setup
Download the Ring App
With the doorbell securely mounted, now it’s time to configure your settings. Make sure your smartphone is ready by downloading the Ring app from the App Store or Google Play Store, if you haven’t already. Create an account or log in with your existing credentials.
The app will guide you step-by-step in setting up your device. It provides an intuitive interface for new users, offering clear instructions at each stage of the installation process.
Connecting to Wi-Fi
In the app, select the option to set up a new device. It will prompt you to connect your doorbell to your Wi-Fi. Ensure that you’ve selected the 2.4GHz Wi-Fi band for better range and reliability. Input your network password and wait for the doorbell to connect.
After a successful connection, the app will allow you to utilize features like live video streaming, motion alerts, and two-way audio capabilities. Test these features to ensure everything is working correctly.

Customizing Your Ring Video Doorbell 4 Settings
Motion Detection Settings
One of the standout features of the Ring Video Doorbell 4 is its adjustable motion detection settings. These options allow you to customize how and when the device alerts you to visitors or movements.
Within the app, you can set motion zones to focus on specific areas that matter most to you. This option helps reduce unwanted notifications from passing cars or pedestrians. Adjust the sensitivity of the motion sensors to fine-tune how responsive the doorbell is to movement, ensuring that you stay informed without being overwhelmed by unnecessary alerts.
Video Playback and Review
The Ring app also allows you to access recorded video footage through your account. This functionality enables you to review any missed alerts or check on activity around your front door remotely. You can save and share clips if needed.
Additionally, explore the settings for recording options, such as how long footage should be stored and the quality of the recordings. By adjusting these settings, you can ensure that you have the optimal footage retention that aligns with your needs.
Enjoying the Benefits of Your New Doorbell
Enhanced Security and Peace of Mind
Installing the Ring Video Doorbell 4 enhances your home’s security by allowing you to see and communicate with visitors remotely. Not only can you keep an eye on packages being delivered, but you can also monitor who approaches your door, whether you’re home or away.
The two-way audio feature makes it easy to converse with delivery personnel or greet guests without opening the door. This added sense of security promotes peace of mind, knowing that you have more control over who enters your property.
Regular Maintenance and Updates
To ensure that your Ring Video Doorbell 4 operates efficiently, practice regular maintenance and keep the device updated. Clean the camera lens periodically to avoid any dirt or obstructions that could impair video quality. The Ring app will notify you when updates are available, so make it a habit to check for these updates regularly. Updates contribute to the longevity and functionality of your doorbell.
Conclusion
Installing your Ring Video Doorbell 4 doesn’t have to be an intimidating task. By following this complete guide, you’ll navigate the installation process step-by-step, ensuring that you enjoy all the features your new doorbell has to offer. From enhanced security to convenience and connectivity, the Ring Video Doorbell 4 provides a modern solution for monitoring your home. Embrace the technology, configure the settings to suit your needs, and experience the peace of mind that comes with superior home security. Enjoy your new doorbell, knowing you’ve taken an important step toward protecting your home and loved ones.


