Introduction to Deadbolt Maintenance and Security
Home security stands as a top priority for every homeowner. We often focus on alarms and cameras. However, the physical lock remains the first line of defense. Deadbolts provide robust protection against intruders. Yet, they require maintenance or replacement over time. You might need to upgrade your security system. Perhaps your old lock has become sticky or broken. Maybe you lost your keys and need a fresh start. Consequently, understanding the mechanics of your door hardware is essential. Many people feel intimidated by the thought of DIY repairs. They imagine complex wiring or specialized tools. In reality, removing a lock is a straightforward process. Anyone with basic skills can handle this task. It saves you money on professional locksmith fees. Additionally, it empowers you to manage your own home security. This guide will walk you through the process. We aim to show you how to remove a deadbolt lock efficiently.
You will learn about different lock types. We will cover the necessary tools and safety precautions. Furthermore, we will discuss troubleshooting common issues. By the end, you will feel confident in your ability. You can tackle this project with ease. Let’s dive into the world of door hardware.
Understanding the Mechanism of a Deadbolt
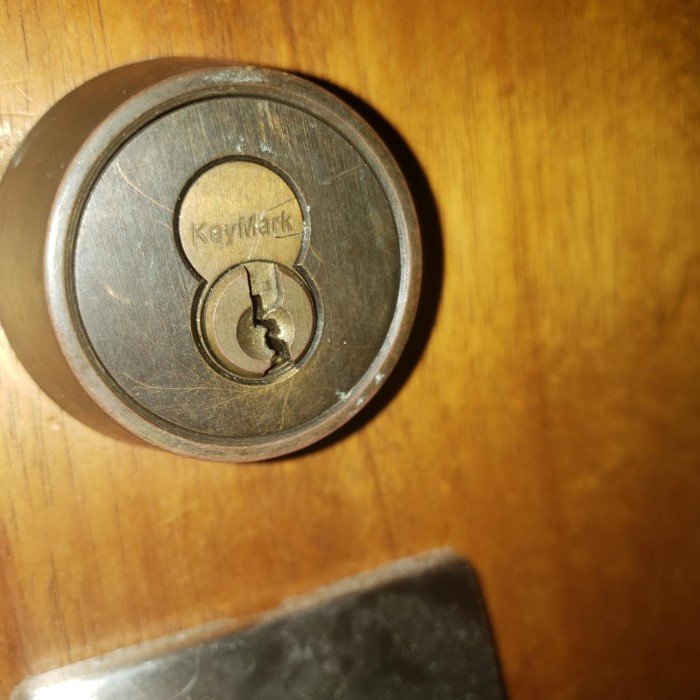
Before you begin, you must understand what you are working with. A deadbolt is not like a standard spring latch. It cannot be moved without rotating the lock cylinder. This design provides superior strength. The bolt slides into the door frame. It creates a solid barrier against forced entry. Generally, deadbolts come in two main types. The first type is the single-cylinder deadbolt. This is the most common type found on homes. It uses a key on the outside and a thumb-turn on the inside. The second type is the double-cylinder deadbolt.
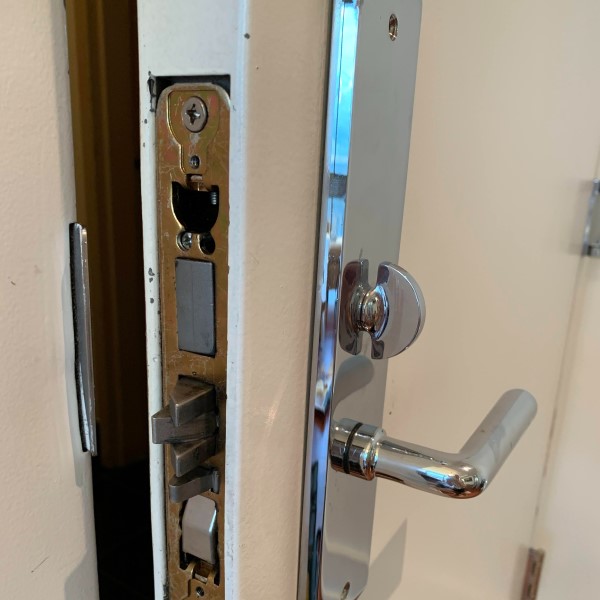
This requires a key for both sides. This type offers more security for glass doors. However, it can be a safety hazard during a fire. You must consider which type you have before starting. Furthermore, the lock assembly consists of several parts. There is the exterior keypad or cylinder. There is the interior mounting plate. Finally, there is the bolt assembly inside the door edge. All these parts connect together. They are usually held by two long mounting screws. Therefore, understanding this assembly helps you visualize the removal process. You will know exactly where to apply force. You will also know which parts are delicate. Knowledge of the mechanism prevents damage to your door. It ensures a smooth removal process.
Essential Tools for the Job
Preparation is the key to any successful DIY project. You cannot remove a lock with your bare hands. Therefore, you need to gather a few essential tools beforehand. This preparation saves you time and frustration. First, you need a screwdriver. Most locks use Phillips head screws. However, some older models might use flat-head screws. It is wise to have a screwdriver set with interchangeable bits. This ensures you have the right fit. Using the wrong size can strip the screw heads. Stripped screws are a nightmare to remove.
Second, you might need a cordless drill. A drill speeds up the process significantly. It is especially helpful if the screws are long. However, you must use the correct torque setting. You do not want to over-tighten or strip the screws. Third, keep a pair of needle-nose pliers handy. These help grip stubborn screws. They can also help pull out the bolt assembly. Sometimes, a small hammer is useful. You might need to tap the lock loose gently. Additionally, have a drop cloth or towel ready. Place this on the floor to catch falling screws. This prevents them from rolling away. It also protects your flooring from dropped tools. Finally, have a container for the screws. It is easy to lose small parts. Thus, organization is crucial. With these tools ready, you are prepared for the task.
Step-by-Step Guide for Standard Deadbolt Removal
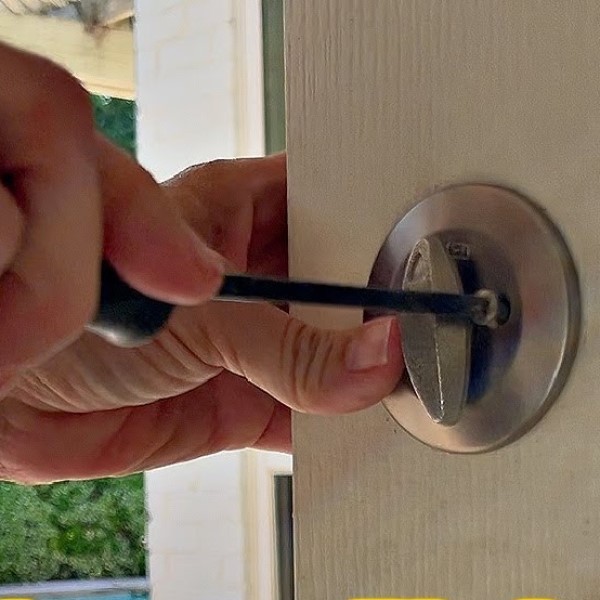
Now, let’s get into the actual process. Most residential deadbolts follow a similar design. This makes the removal process quite standard. First, locate the interior side of the lock. This is the side facing into your home. You will see a decorative plate. This plate covers the mounting screws. You must remove the thumb-turn first. It usually unscrews counterclockwise. Some models have a small set screw. You must loosen this screw to remove the knob. Next, look for the mounting screws. They are typically located above and below the keyhole. Insert your screwdriver into the head. Turn them counterclockwise to loosen them. Place the screws in your container immediately. After removing the screws, the two halves of the lock should separate.
Gently pull the interior assembly away from the door. Then, pull the exterior assembly from the outside. If they stick, wiggle them gently. Do not force them. Finally, you need to remove the latch bolt. This is the part that slides in and out of the door edge. Look for two small screws on the side of the door. Remove these screws. Then, pull the latch bolt out of the door. You have now successfully learned how to remove a deadbolt lock. This method works for the majority of standard locks.
Handling Locks with Hidden Screws
How to remove a deadbolt lock? Some modern locks have a sleeker design. Manufacturers often hide the mounting screws for aesthetics. This design looks cleaner. However, it can confuse homeowners during removal. Do not worry. The process is still manageable. You just need to find the hidden mechanism. Look at the interior rose plate. This is the round plate sitting against the door. It usually snaps into place. You can remove it by prying it gently. Use a small flat-head screwdriver. Insert the blade into the notch on the edge. Gently twist the screwdriver to pop the plate off. Be careful not to scratch the finish. Once the plate is off, you will see the mounting screws. Proceed to remove them as described before. Sometimes, the thumb-turn itself hides the screws.
You may need to unscrew the thumb-turn cap. Hold the base steady and turn the top counterclockwise. Underneath, you will find the securing screws. Furthermore, some smart locks have hidden screws under a battery cover. You must remove the battery compartment first. Always inspect the lock closely before you start. Look for any seams or removable parts. If you cannot see screws, they are likely hidden under a cosmetic cover. Patience is key here. Once you reveal the screws, the removal process becomes standard.
Removing a Stuck or Broken Deadbolt
How to remove a deadbolt lock? Sometimes, a lock fails before you can remove it. The cylinder might jam. The key might break off inside. This creates a stressful situation. However, you can still remove the lock. If the key is broken, do not force it further in. Use needle-nose pliers to pull the broken piece out. If that fails, you might need a broken key extractor tool. If the lock is simply jammed, try lubrication first. Spray a graphite lubricant into the keyhole. Insert the key and wiggle it gently. This might free up the pins. If the lock is completely non-functional, you may need to drill it out. Drilling should be a last resort. Use a drill bit slightly larger than the keyhole. Drill through the center of the cylinder. This destroys the pins. Then, you can use a screwdriver to turn the mechanism.
If the screws are stripped, use a rubber band. Place the rubber band over the screw head. Press the screwdriver firmly into the rubber band. This provides extra grip. Turn slowly to back the screw out. For a seized latch bolt, you may need to remove the door from its hinges. This allows you to access the latch from a better angle. Alternatively, you can use a hacksaw. Cut through the latch bolt if necessary. Remember to wear safety glasses when drilling or cutting.
Troubleshooting Common Issues During Removal
How to remove a deadbolt lock? DIY projects rarely go perfectly smoothly. You might encounter a few hiccups. One common issue is a painted-over lock. Paint can seal the screws and plates. Use a utility knife to score the paint around the plate. This breaks the seal. Then, you can pry the plate off without chipping the paint. Another issue is screws that spin but do not come out. This usually means the screw threads are stripped. Try applying outward pressure on the screw head. Use a pry bar or putty knife behind the plate. Pull it towards you while turning the screw.
This can help the threads catch. Furthermore, the lock might be frozen due to rust. Apply a penetrating oil like WD-40. Let it sit for 15 minutes. This helps dissolve the rust. Tap the lock lightly with a hammer. The vibrations help the oil penetrate. Then, try to remove the screws again. If the lock is old, the screws might be brittle. They can snap off easily. Go slowly and apply steady pressure. Never rush the removal process. Rushing leads to mistakes and broken parts. If you feel stuck, take a break. Assess the situation calmly. There is always a solution to a mechanical problem.
Preparing the Door for a New Lock
How to remove a deadbolt lock? Once the old lock is out, your job is not finished. You must prepare the door for the new hardware. Inspect the holes in the door. Are they the correct size? Most deadbolts require a standard bore hole. This is usually 2 1/8 inches in diameter. If the hole is too small, use a hole saw to enlarge it. If the hole is too large, you might need an adapter plate. This ensures the new lock fits securely. Next, check the cross-bore hole on the edge of the door. This hole houses the latch bolt. Ensure it is clear of debris. Use a vacuum or compressed air to clean it out.
Wood splinters or metal shavings can interfere with the new latch. Furthermore, check the door frame. The strike plate area must be clean. Remove any old paint or debris. If the wood in the frame is rotten, repair it before installing a new lock. A strong lock is useless in a weak frame. Fill any stripped screw holes. Dip wooden toothpicks in wood glue. Stuff them into the screw holes. Let the glue dry completely. This provides new wood for the screws to grip. This preparation ensures your new deadbolt functions correctly. It also maximizes the security of your home.
FAQ
Can you remove deadbolt without a key?
Yes, you can remove a deadbolt without a key if the door is unlocked. If the door is locked, you may need to drill out the lock cylinder or use a lock pick to disengage the bolt before removing the assembly screws.
How to take deadlock off?
To take a deadlock off, unscrew the mounting screws on the interior side of the door. Pull the inside and outside handles apart. Then, unscrew the screws on the door edge to remove the latch bolt assembly.
What is the difference between a deadlock and a deadbolt?
The terms are often used interchangeably. However, a deadbolt specifically refers to a lock bolt that cannot be moved to the open position except by rotating the lock cylinder. A deadlock is a broader term often referring to a lock that cannot be picked or moved without a key.
Conclusion
Maintaining your home’s security is an ongoing responsibility. Knowing how to remove a deadbolt lock is a valuable skill for any homeowner. It allows you to upgrade your locks instantly. You can also fix broken hardware without waiting for a locksmith. This guide has provided you with the necessary steps. We covered standard removal and hidden screws. We also discussed handling stuck locks and troubleshooting common problems. Remember to work patiently and use the correct tools.
Safety should always come first. Once the old lock is out, take time to prepare the door. This ensures your new lock offers maximum protection. A well-installed deadbolt gives you peace of mind. It keeps your family and belongings safe. Do not hesitate to tackle this project. You have the knowledge and the confidence to succeed. Your home security is in your hands.